Update – Oct. 2015: This is out of date. You can set up a FREE CI server through CircleCI. Watch this video on how to do that.
This post is part 2 in a series of posts of how to set up an Android build server.
Posts:
- Part 1 – The Server
- Part 2 – Installing Hudson (this post)
- Part 3 – Installing the Android SDK
- Part 4 – Communicating with GitHub (coming this week)
- Part 5 – Creating a Hudson Build Job (coming this week)
In this post I’m going to show you how to install Hudson CI on a 64bit Ubuntu 10.04 LTS headless server (no gui).
Note: I did this about 2 months ago. If you see any typos or find any errors, please comment so I can fix them. Thanks!
Installing Hudson
Once you have Java installed you can install Hudson. Hudson can be installed as a Debian package, and that’s what I’m going to do here. You may want to look at the hudson installation documents as these instructions may be out of date (depending on when you found this site) or if you’re using a non-debian system.
The instructions on Hudson’s site can be found here: http://wiki.hudson-ci.org/display/HUDSON/Installing+Hudson
Installing Hudson as a Debian package offers a few benefits:
- Automatic upgrade of Hudson via apt
- /etc/init.d hook up to start Hudson on boot
Here’s how I added Hudson CI to my Ubuntu 10.04 LTS server.
From the command line, type the following:
wget -O /tmp/key http://hudson-ci.org/debian/hudson-ci.org.key
sudo apt-key add /tmp/key
This will add a temporary key to the Hudson CI Debian repository and the second line will add the repository to the list of sources.
Now, it’s as simple as typing the following:
wget -O /tmp/hudson.deb http://hudson-ci.org/latest/debian/hudson.deb
sudo dpkg --install /tmp/hudson.deb
The first line gets the hudson.deb package file.
The second line installs Hudson.
Troubleshooting
Right after I ran:
wget -O /tmp/hudson.deb http://hudson-ci.org/latest/debian/hudson.deb
 sudo dpkg --install /tmp/hudson.deb
I received an error:
hudson: Depends: daemon but it is not installed
To fix this, you will need to install the hudson deamon by running the following command:
apt-get install hudson daemon
Now, re-run the following and you shouldn’t have any issues.
wget -O /tmp/hudson.deb http://hudson-ci.org/latest/debian/hudson.deb
sudo dpkg --install /tmp/hudson.deb
Updating Your Hudson Install
Once you’re Hudson CI is installed, its best for you to update it to make sure you have all the patches and updates possible. To get those updates, run the following command:
apt-get update; apt-get install hudson
This will update Hudson and make sure that Hudson is installed and up to date.
Wrap Up
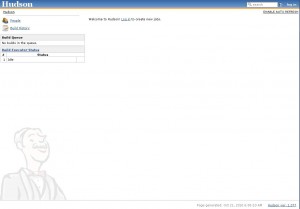
Hudson is now installed. You should be able to go to your web browser and hit port 8080 on the server, such as http://example.org:8080 and Hudson will load. If you want Hudson to run under port 80, please see the Hudson documentation for instructions. I’m running mine on port 8080 with no problems. You should see a screen that looks similar to this:
In the next post I’ll install the Android SDK and download all of the necessary SDK’s (Android versions) that we need to build our applications.
